Have you ever needed to be able to update information in Salesforce without a license? For cost or security reasons or if you have temporary employees or interns, you may not want all your employees to have Salesforce access, but they still may need to update data.
With FormAssembly’s Salesforce Prefill and Submit Connectors, we can set up a form that approved employees in your company can use to review and/or update information from your Salesforce org. Since this use case deals with personally identifiable information (PII), we’ll show you how to put additional authentication in place to ensure that this form is only accessible to the people within your company that you want to have access to it.
In this example, we’ll assume we have a data entry specialist that we would like to have work on our Account Record data from our Salesforce org but that we can’t give full Salesforce access to. We currently have lots of missing data on our Account records for the Industry field and we need someone to look it up and update it.
Form setup
*Note: this does require someone with a Salesforce license to set up and authenticate the mapping through the FormAssembly Salesforce Connector. Refer to our Knowledge Base articles on Salesforce Connector setup if you are not sure how the Salesforce Connectors work.
First, create a form and include the necessary Account Record fields from Salesforce:
- Name – text input
- Industry – drop-down menu
- Account ID – hidden field
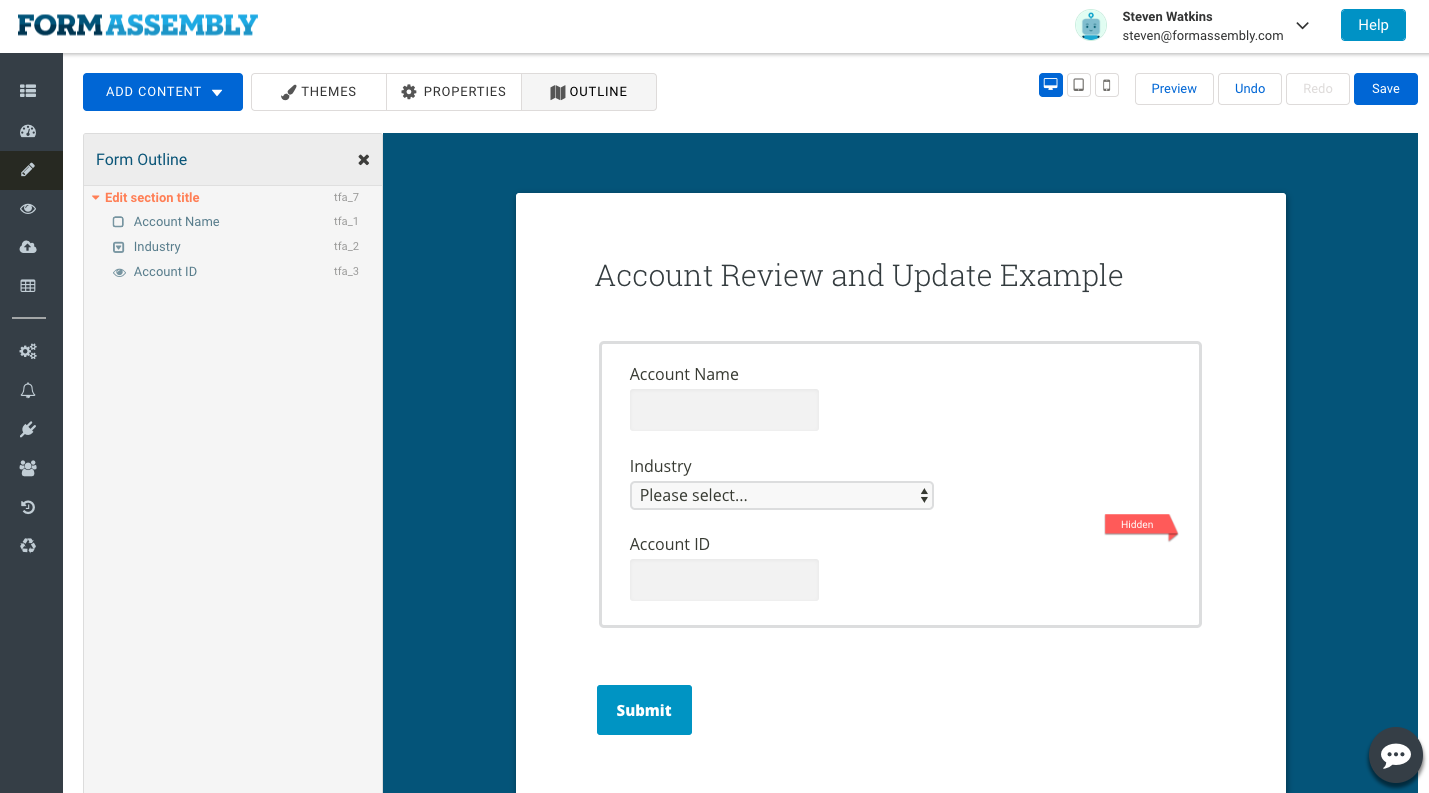
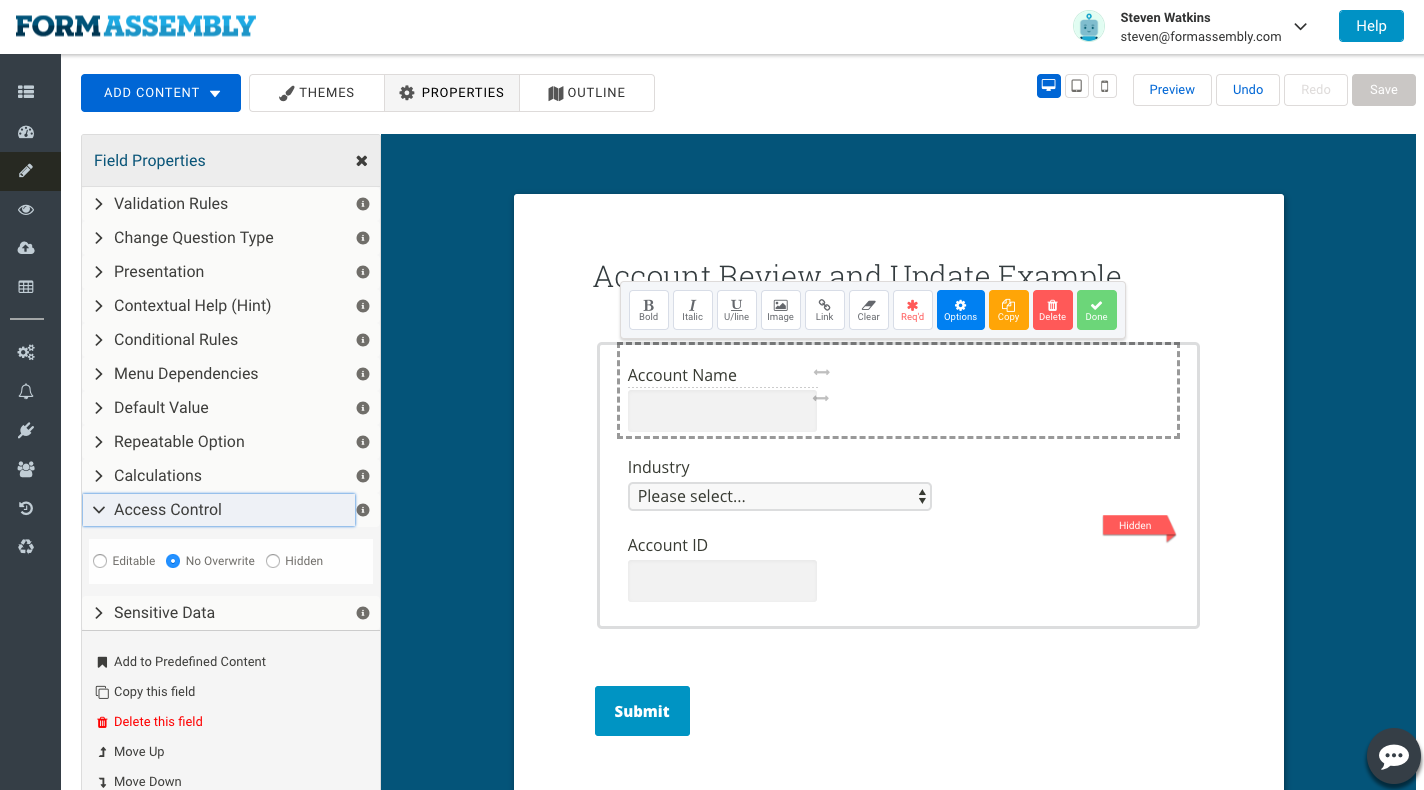
Next, set up Access Controls on the Account Name field so no one can edit the information prefilled into it. We only want to allow Industry to be updated on our records. Set up edit only on the Industry drop down field under the fields’ Access Controls settings. This is particularly important when we’re allowing a person to update information in Salesforce without a license because we want to limit their editing abilities to only the data we’re already limiting their access to.
Navigate to the Account Record field set up page in Salesforce and find the standard Industry picklist field.
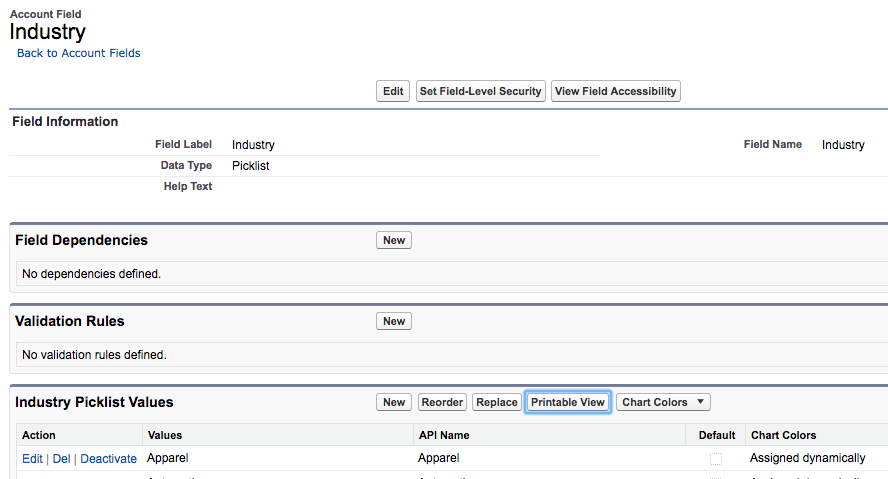
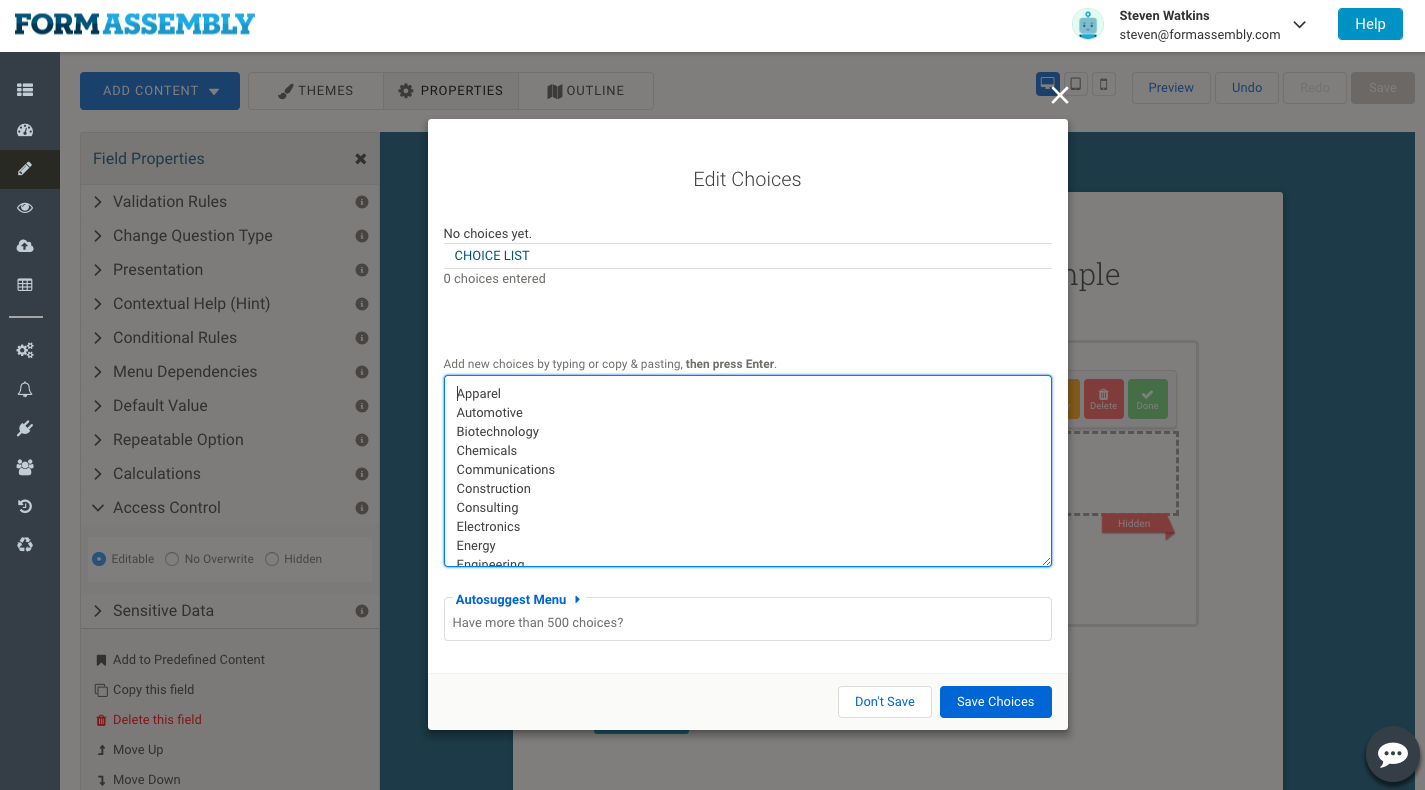
Navigate to a print view of the list and then Copy and Paste the list of Industries from your Salesforce org into the ‘Edit Choices’ setup.
Salesforce connector setup
Salesforce prefill connector
In the Prefill Connector, set the look-up based on Industry, with a value from a text or formula that equals NULL. Review the picture below for details.
The criteria you set up here is important to test first when we’re allowing a person to access and update information in salesforce without a license. We want to be sure we are selecting the precise records we want them to view and or edit.
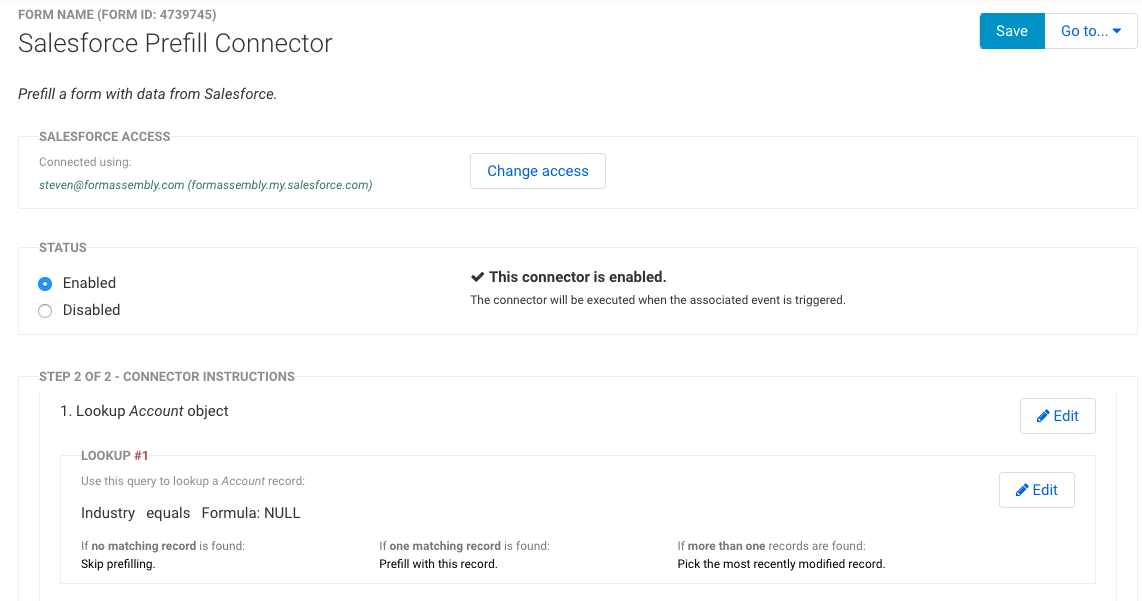
With this criteria, we will prefill only Account records without an Industry and map in the existing Account Name and ID.
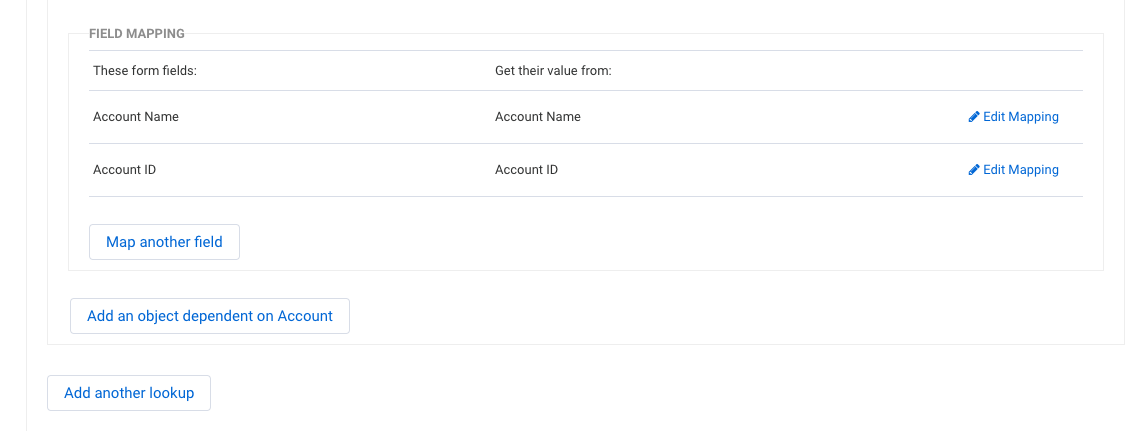
In this example, we are prefilling and updating one record at a time, however, we can set up this form to prefill an unlimited or limited amount of records, instead of just one at a time, by setting the group our fields are in to be repeatable. Once we set this group to be repeatable, we can specify how many records we want prefilled each time this form loads for our data entry specialist.
We will go over this easy update in our testing section below, but sometimes one record at a time is enough!
Salesforce submit connector
In our Submit Connector, we’ll set up one step to ‘Update’ the Account object record we’ve pulled into our form.
Set the first step to Update an Account object record and look it up using the Account ID field in SF from the hidden Account ID field in your form.
This step ensures that when we’re using the form to update Salesforce we map it back to the correct record prefilled in our previous steps.
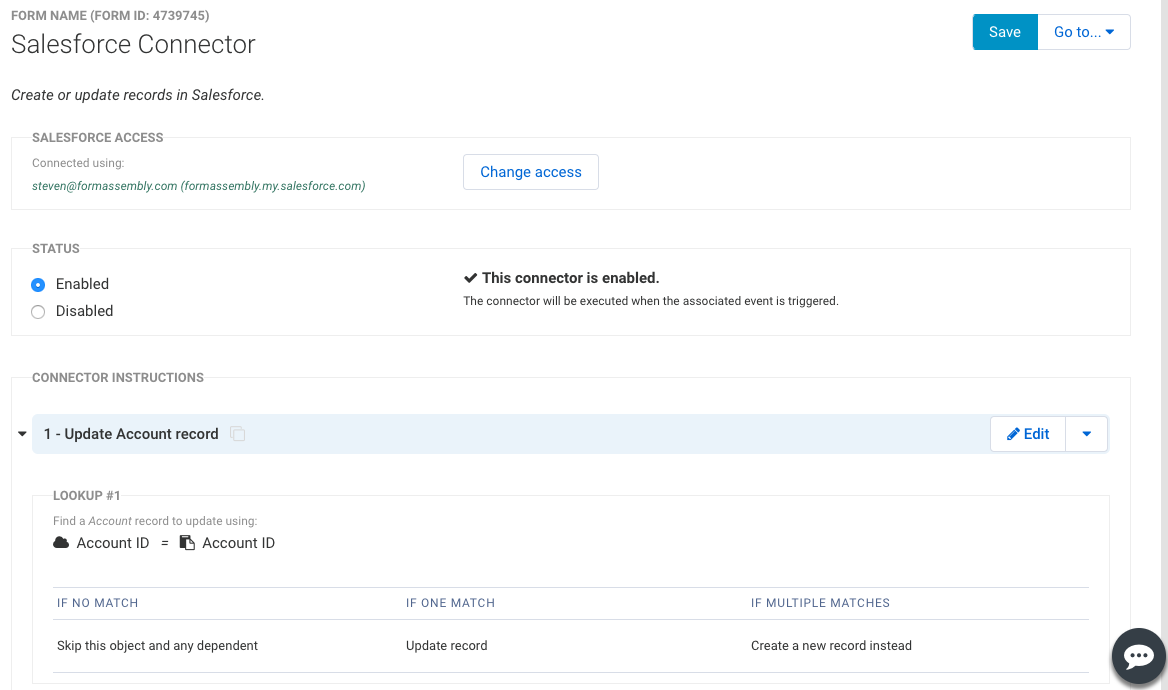

If we have repeated fields for multiple records prefilling into our form we can leave the option as is to map to their respective records instead of merging them all together.
Test
Prefill one Salesforce record
Upon visiting the public form URL we will see the most recently modified record prefilled with the Account Name field uneditable and the Industry drop down field ready to take a value.
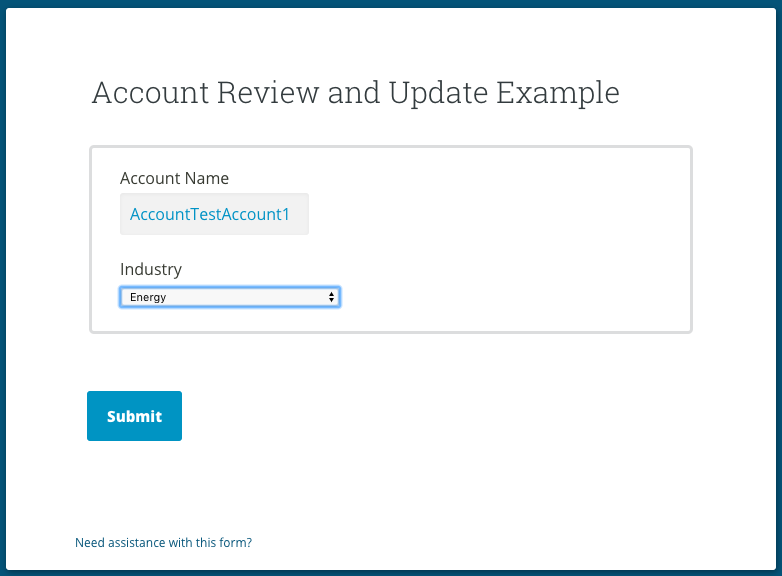
Above, we’ve prefilled a test account and have selected an Industry to update it to with our form.

This is the record in Salesforce with the Industry field updated after our form submission.
Prefill multiple SF records
Now let’s update the form and the Salesforce Prefill Connector to look at more than one record at a time and run another test.
First, update the group of fields in the form builder.
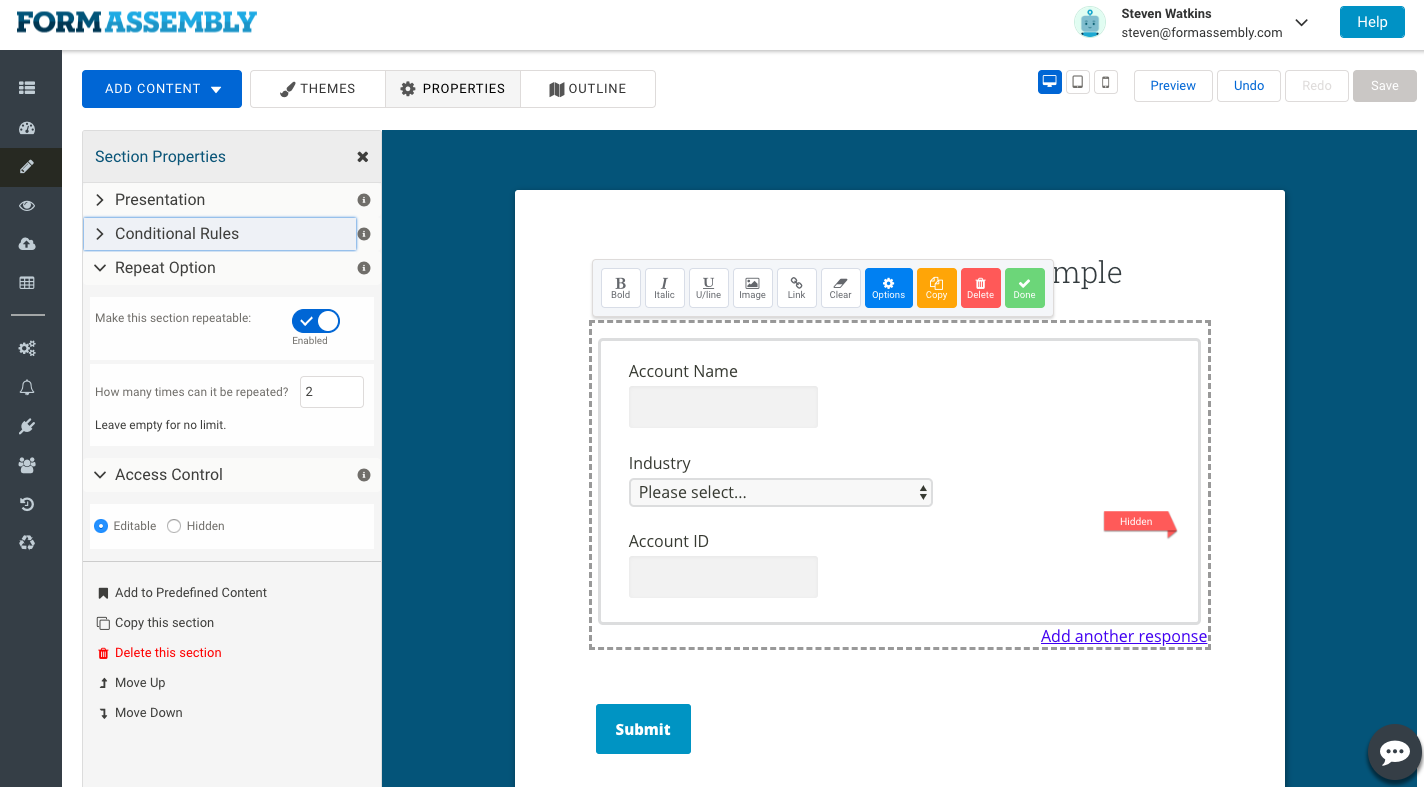
Next, we’ll move to the connector to update the logic for finding multiple records to Repeat Fields (If applicable, which is it for this use case).
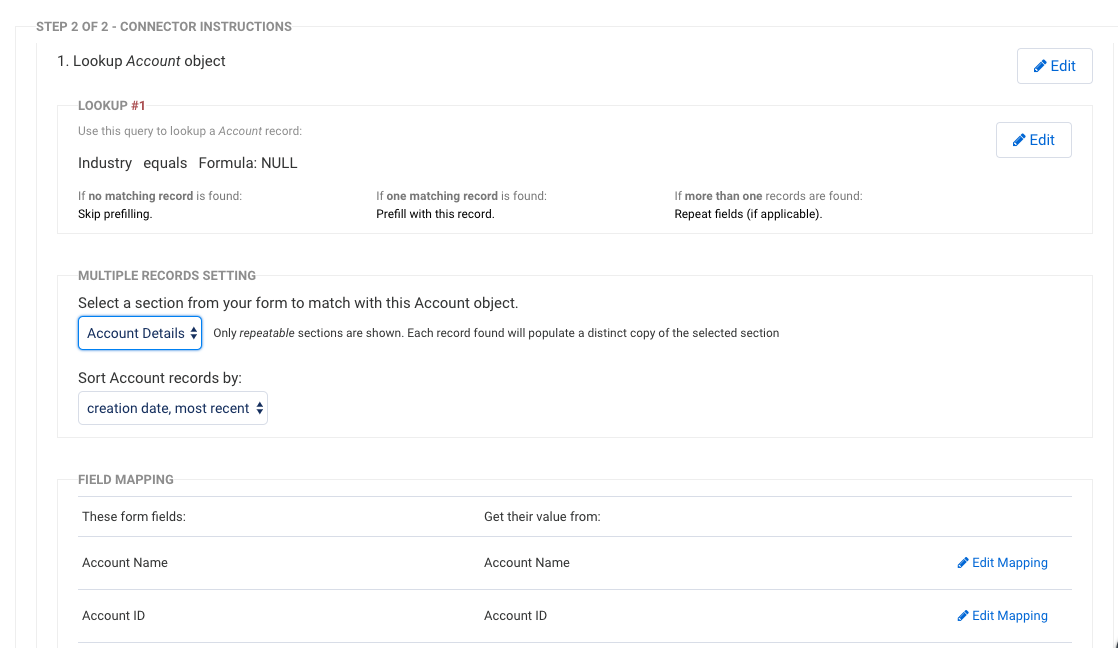
*Note: Make sure that you specify the group that repeats in the drop-down menu, located in the Multiple Records Setting section. This appears after selecting ‘Repeat Fields (If applicable)’.
You can also adjust the way the records prefill when repeating entries into the form. For example, instead of prefilling based on Most Recently Modified records, we could update it to prefill the Most Recently Created records.
Now we test!
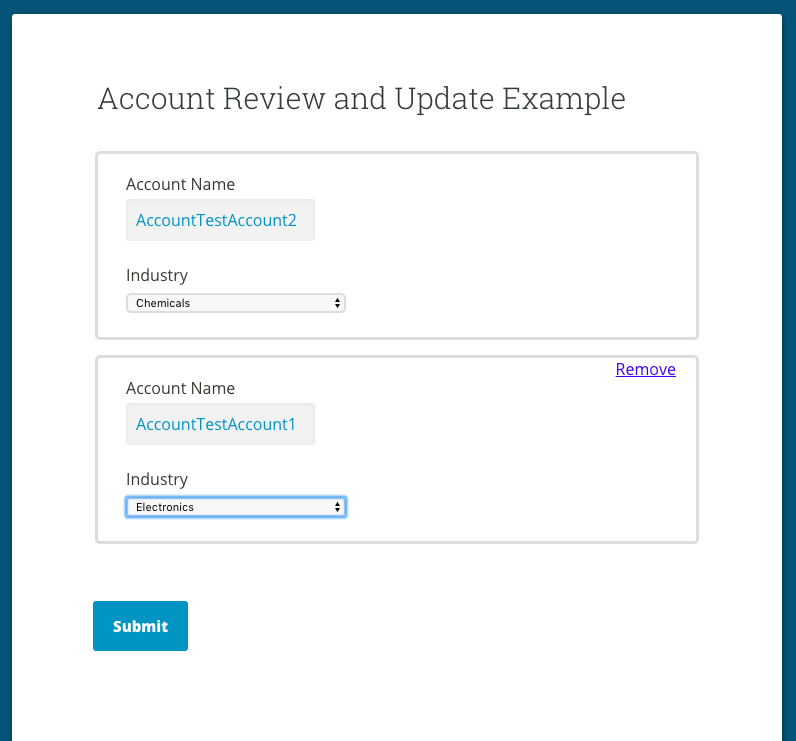
Here we show multiple entries prefilled into our form.

This image shows the first Salesforce record updated.

And this image shows the second updated Salesforce record.
One thing to keep in mind is the loading time of your form. The more records you prefill and data you expose, the longer it will take to load. Test your form to gauge the load time depending on your needs for exposing the data.
Set up form authentication
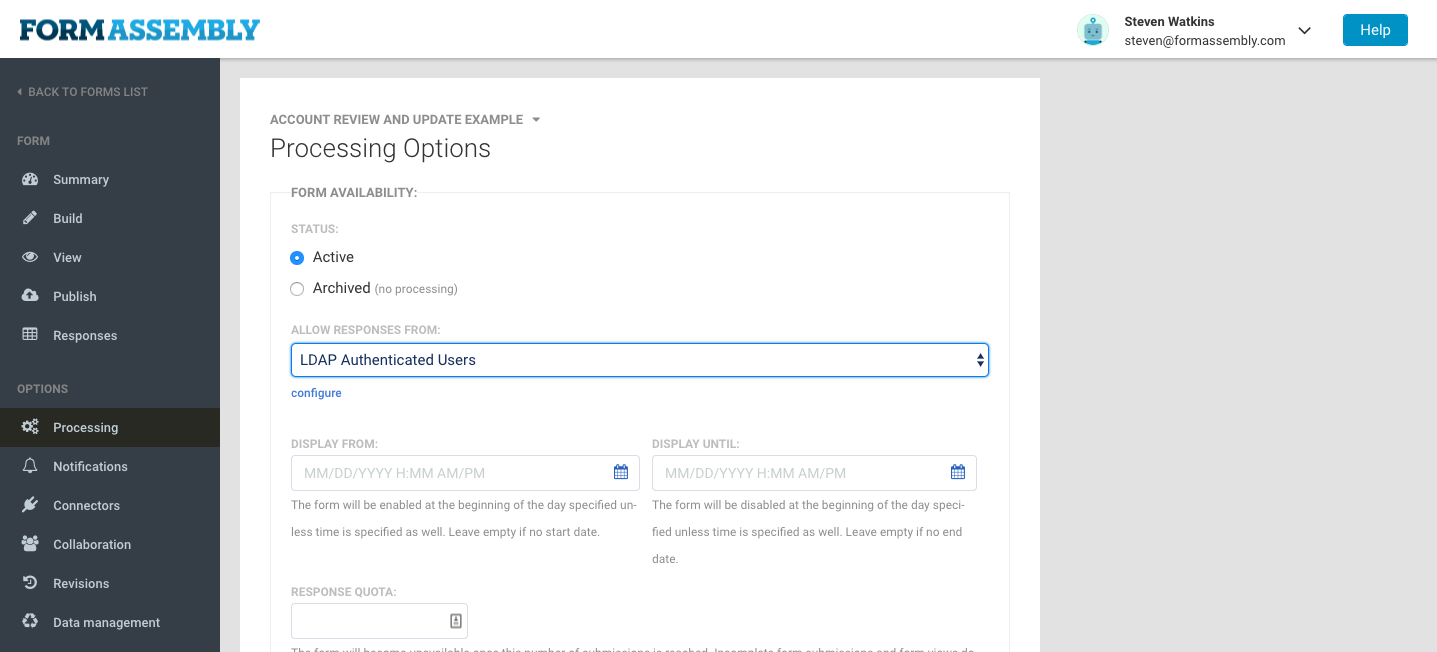
When users that don’t have a Salesforce license are updating Salesforce with FormAssembly forms, we’ll need to ensure that our users are still authenticated when accessing the form in some way, because technically, FormAssembly forms are publicly accessible unless restricted by your publishing method or some form of authentication like CAS, LDAP, SAML, or Salesforce.
In this example, we cannot set up Salesforce authentication because the person we’re allowing to access and update information in Salesforce without a license doesn’t have a license to begin with.
There are a number of authentication methods that can be enabled on your form to protect it from external users, most importantly, only allow internal and specific users access. Head on over to review the steps in our Knowledge Base to set up your specific authentication method. This may require working with your IT Team to obtain the necessary keys or data types.
Give this a shot and let us know how your testing goes! Reach out to our support team if you have questions along the way, and if you enjoyed this post, check out another tutorial: “How’d You Do That?!: Quickly Create a Form to Populate Any Salesforce Object”