If you use FormAssembly forms for data collection, you know how important it is to collect valid, mailable email addresses. When a contact enters an incorrect email address, this prevents you from connecting with them and prevents them from receiving valuable information from you.
This tutorial will discuss how to add NeverBounce verification to your FormAssembly forms so that email addresses can be verified before submission.
Requirements
For this tutorial, you’ll need your own NeverBounce account and a FormAssembly account on any plan. Don’t have an account yet? Sign up for a free trial — no credit card required.
NeverBounce setup
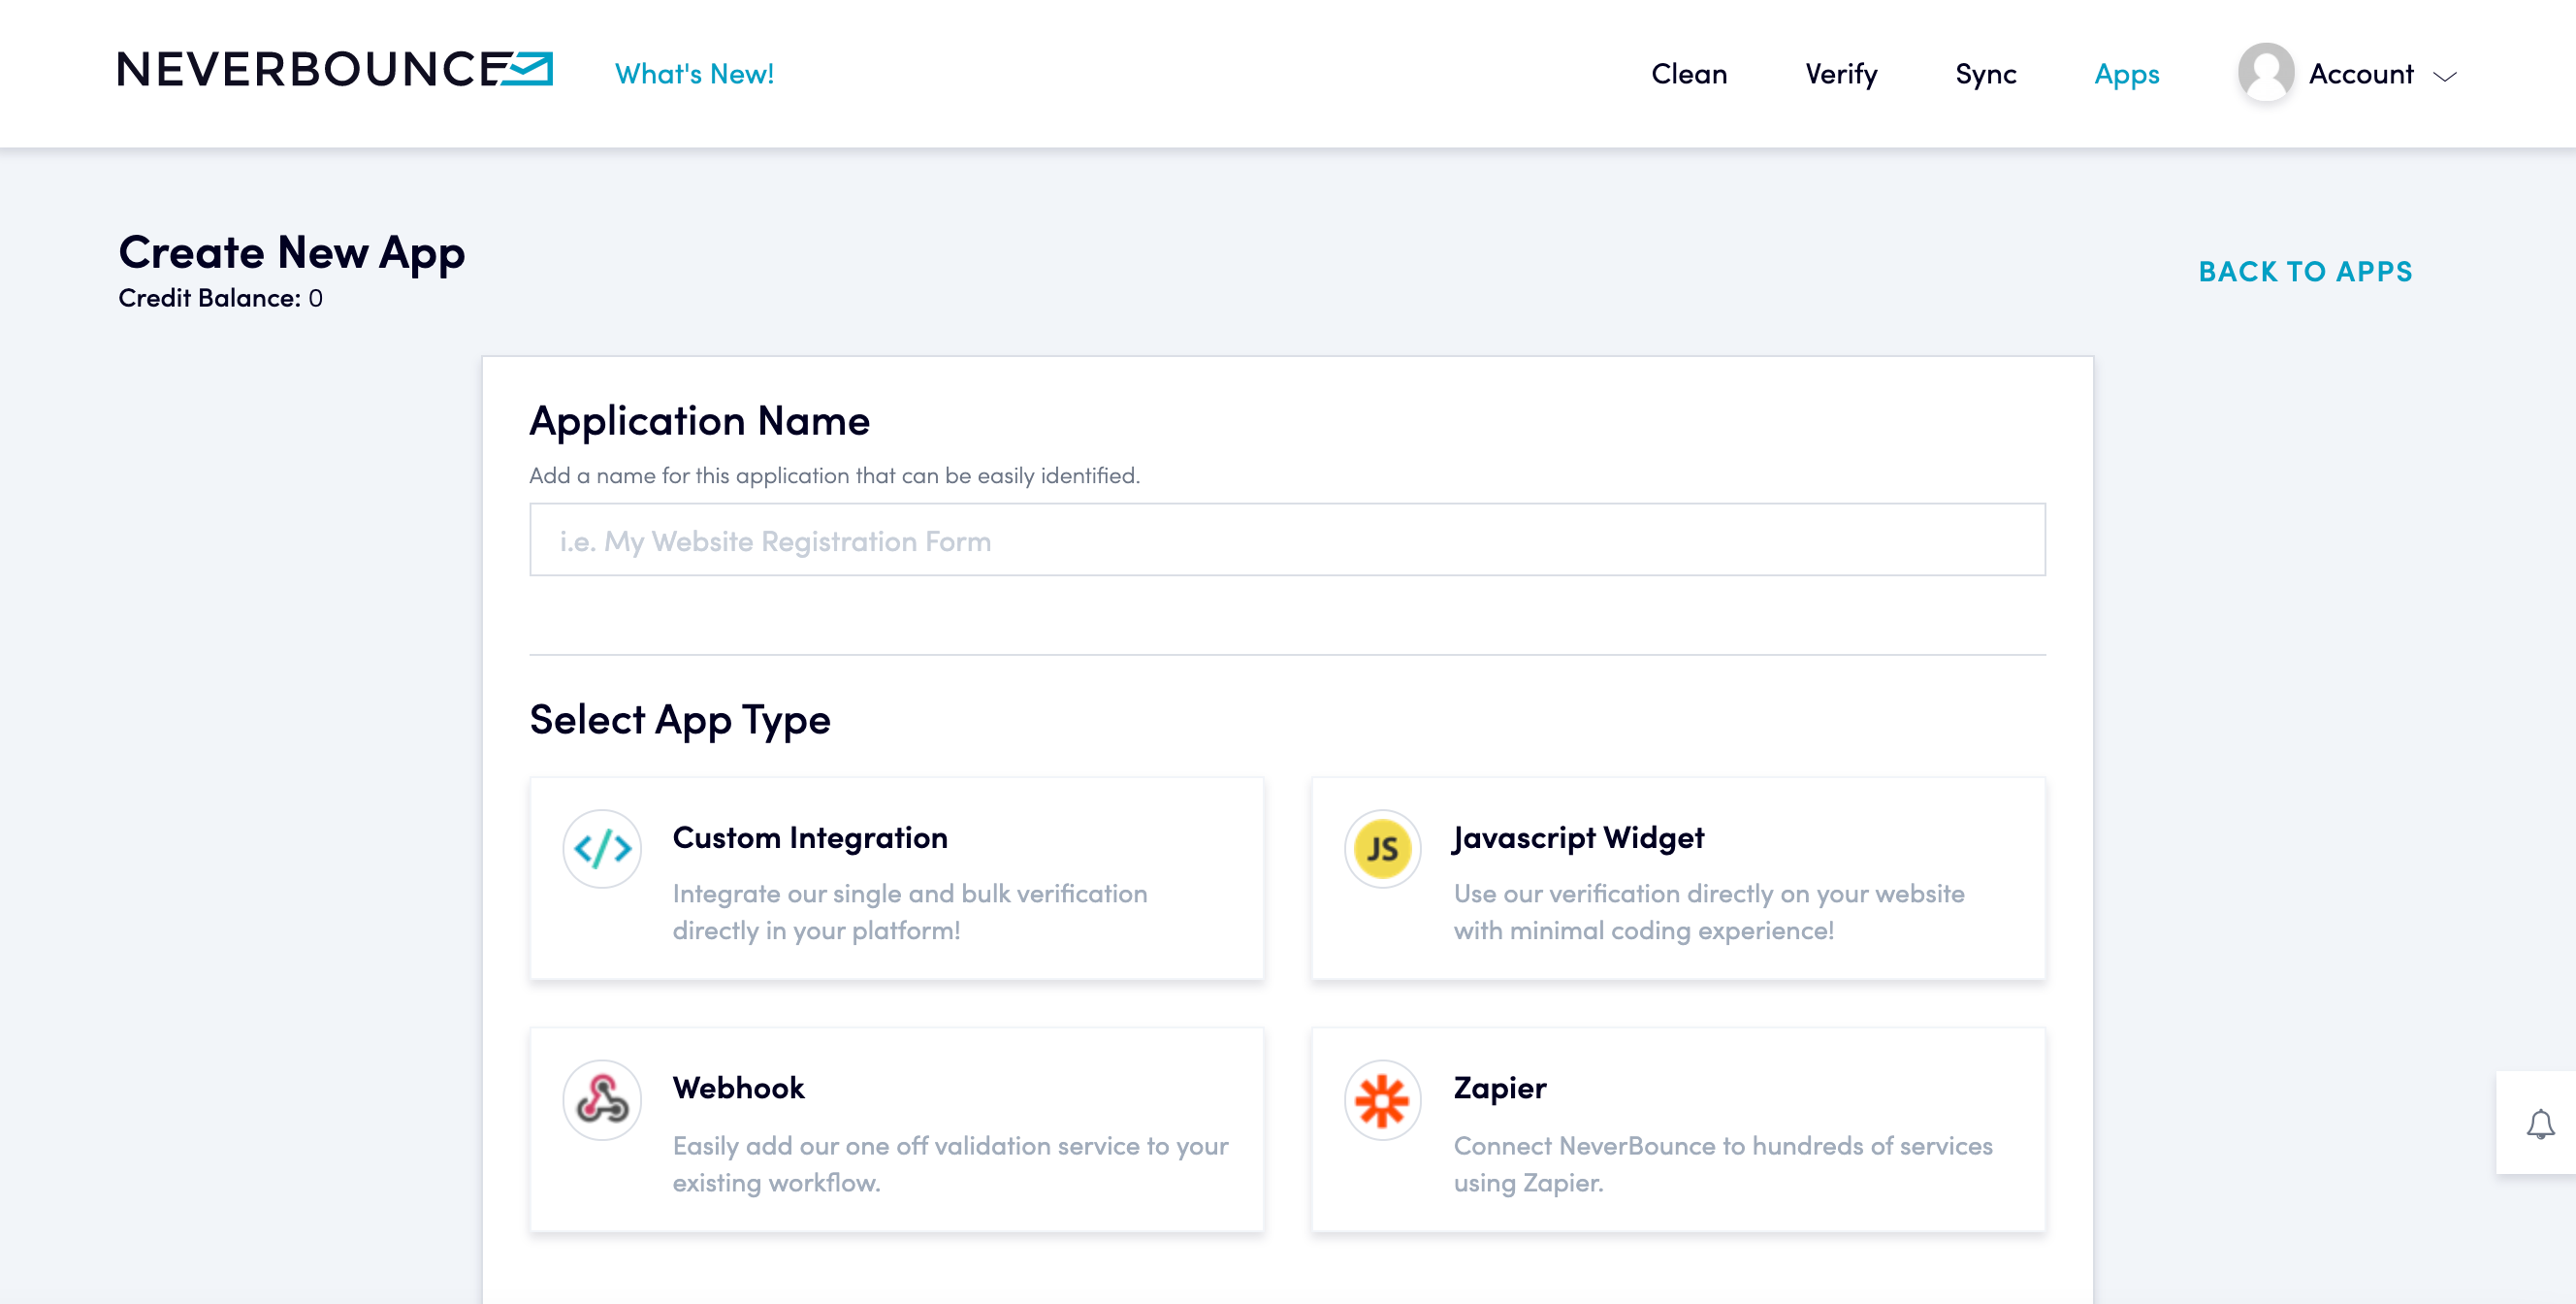
First, you’ll need to grab a block of code that contains a unique API key from your NeverBounce account. To do this, go to the Apps tab in your account. Then, create a new app and select “Javascript Widget” from the options.
During setup, you’ll need to add all the authorized domains where your forms will live. Add your preferred throttling and load balance configurations to finish.

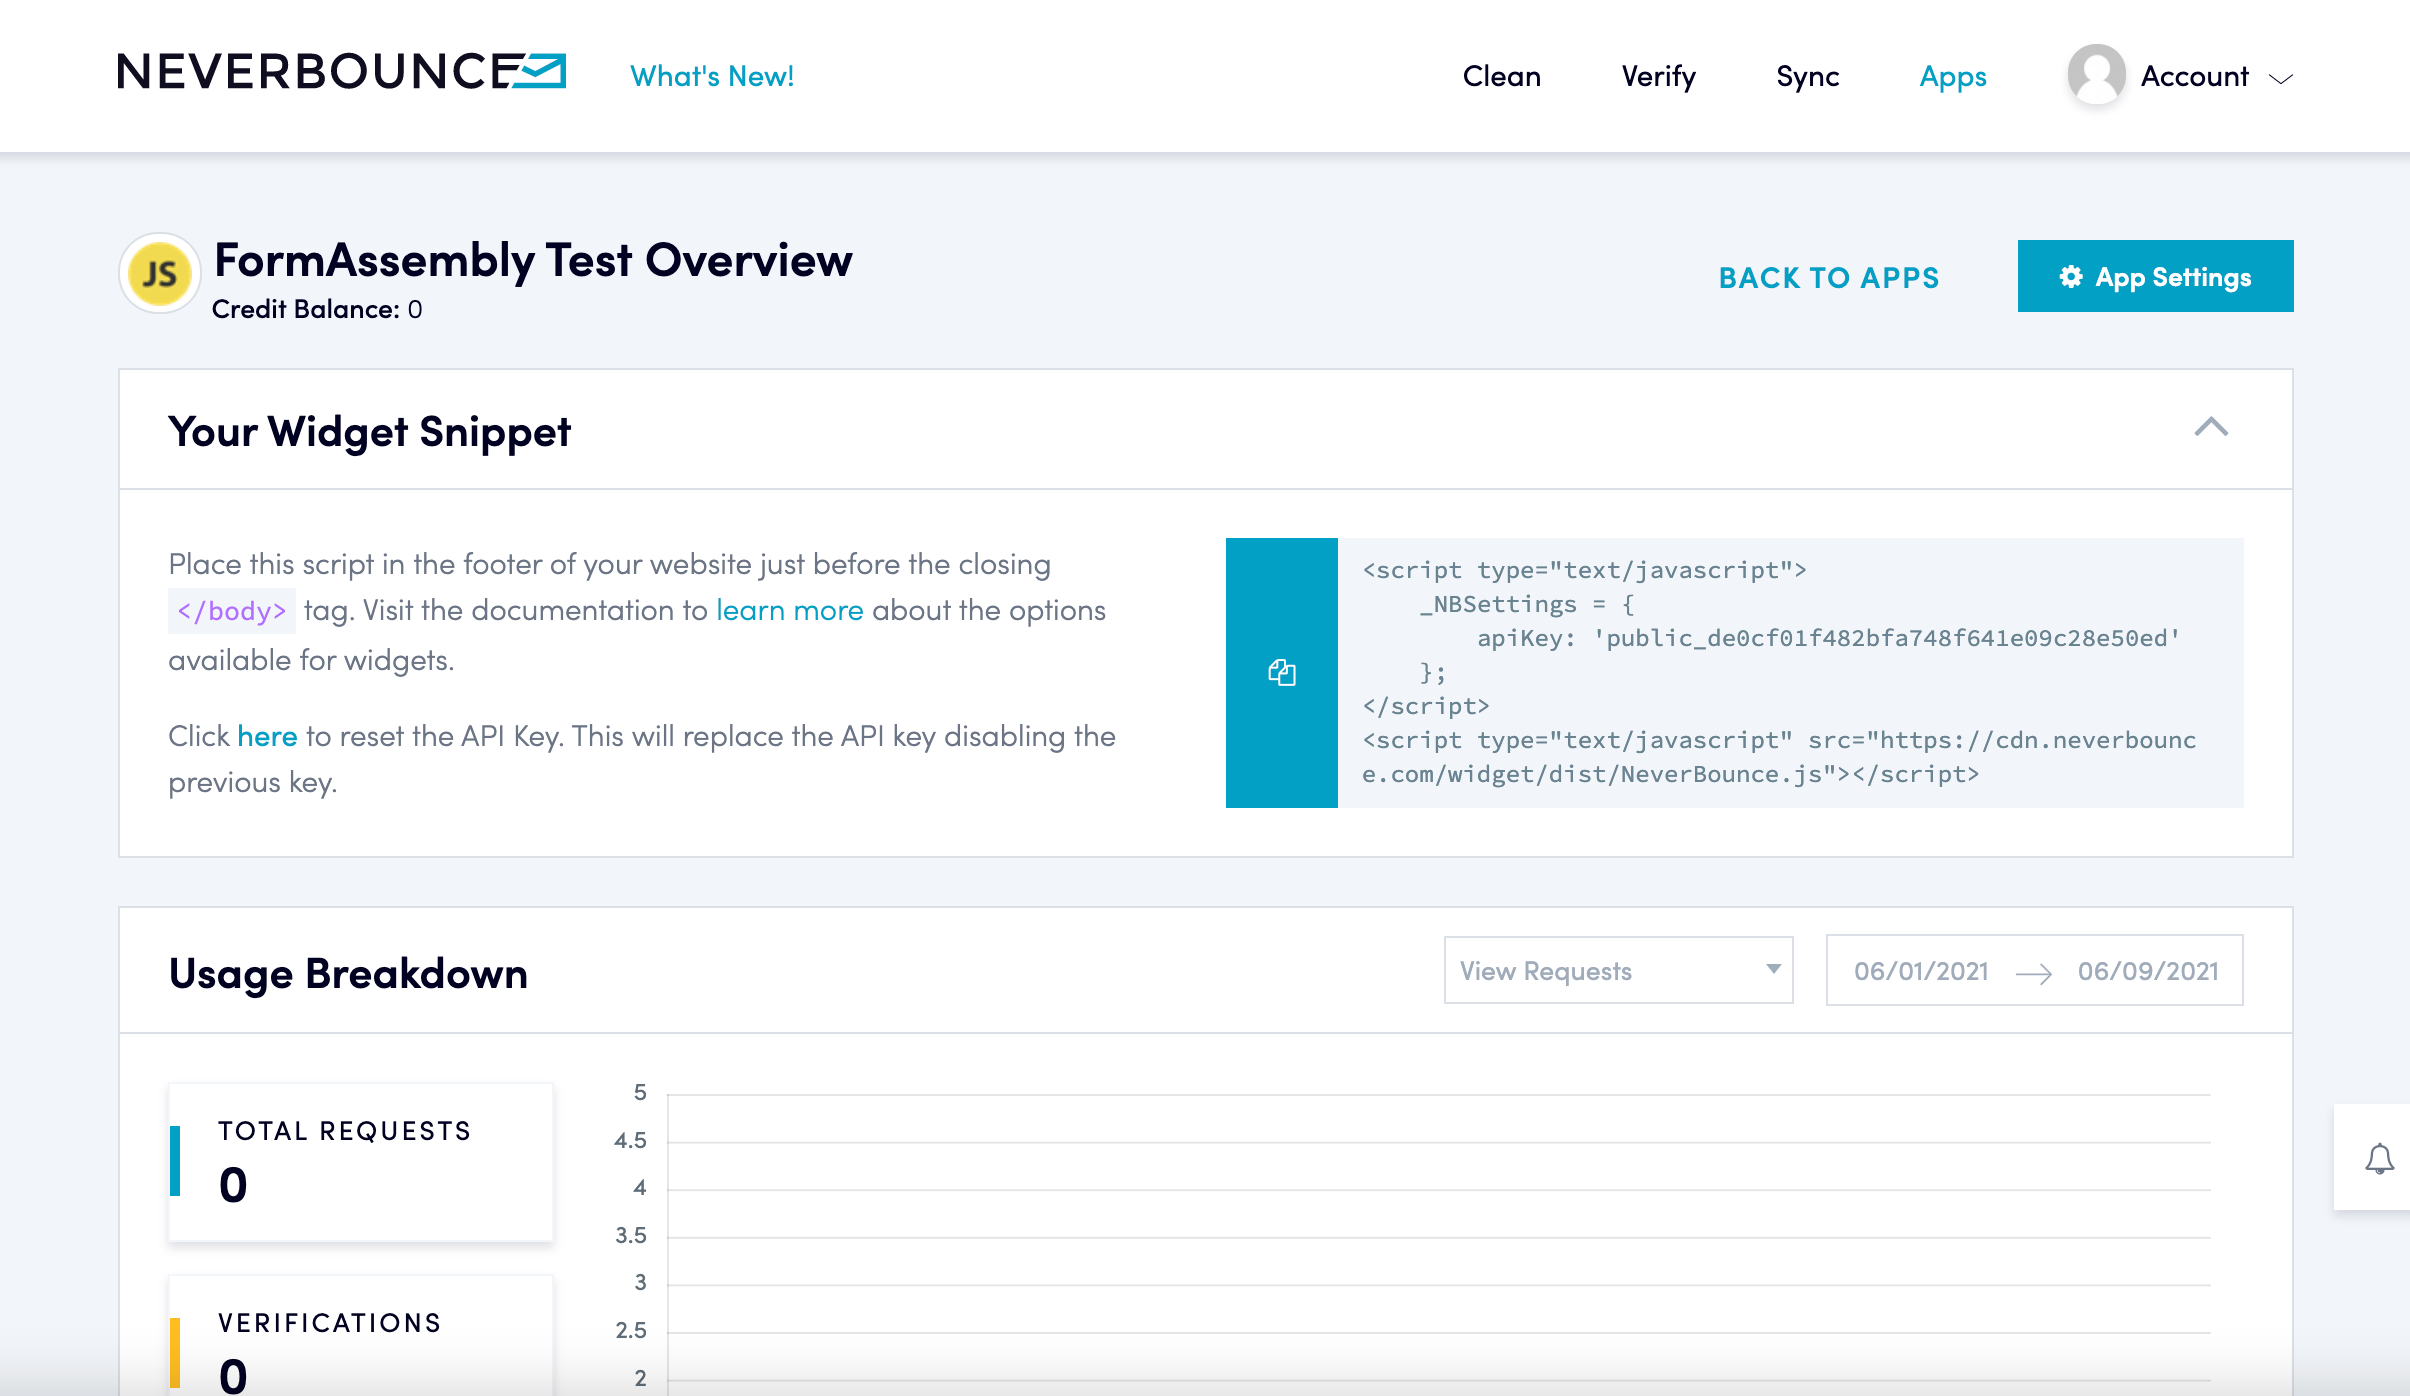
Next, copy the code with the API key inserted from the new app you created. We’ll continue the setup in FormAssembly.

FormAssembly setup
Take the code you just copied from NeverBounce and paste it into the custom code box in the properties tab of your FormAssembly form.
After pasting and saving the code, you’ll need to add two additional scripts to make the email verification work correctly. First, add this script above the NeverBounce code. This script essentially tells NeverBounce that your email field is an email field.
<script type="text/javascript">
document.addEventListener("DOMContentLoaded", function(event) {
var emailFieldId = 'tfa_XX';
var emailFieldTarget = document.getElementById( emailFieldId );
console.log(emailFieldTarget);
emailFieldTarget.setAttribute('data-nb','');
});
</script>
You’ll replace tfa_XX with the field alias of your email field. This script checks to see if this page is loaded, then assigns a variable name to the FormAssembly email field alias. The script then targets that field and adds “data-nb,” which is a snippet of code that NeverBounce needs to see to do its job.
You’ll also need to add an additional script after the NeverBounce script you pasted.
<script type="text/javascript">
document.querySelector('body').addEventListener('nb:registered', function (event) {
document.getElementById('submit_button').disabled = true;
// Get field using id from registered event
let field = document.querySelector('[data-nb-id="' + event.detail.id + '"]');
// Handle results (API call has succeeded)
field.addEventListener('nb:result', function(e) {
if (e.detail.result.is(_nb.settings.getAcceptedStatusCodes())) {
// Do stuff for good email
document.getElementById('submit_button').disabled = false;
}
else {
// Do stuff for bad email
console.log('bad email');
document.getElementById('submit_button').disabled = true;
}
// }
});
});
</script>
This script checks to ensure that NeverBounce is ready and active. Once verified, the submit button on your form is disabled until the form gets a result on the email verification. Based on the results of the verification, the submit button stays disabled or is enabled.
Once you’ve completed the code customizations, save and test your form to ensure it works as expected before embedding it on your website or sharing it with your users.
Did you enjoy this tutorial? Our blog has dozens of technical walkthroughs to help you innovate with FormAssembly. Try “How to Build a Training Dashboard Form with Zero Custom Code” next.

